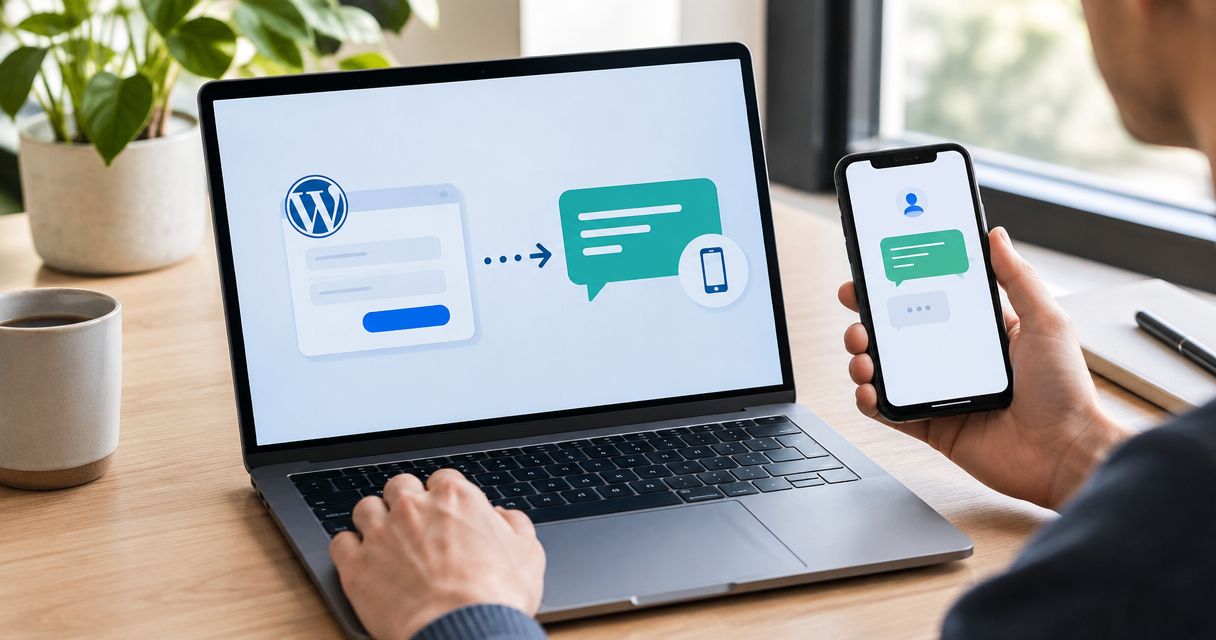
Instead of copying WordPress inquiries into your phone, connect each eligible form submission to a business SMS acknowledgment and a team-owned conversation. This 2026 wordpress contact form to sms workflow covers consent, field mapping, duplicate prevention, and reply handling—not just the first outgoing text.
- A wordpress contact form to sms workflow needs a submission trigger, consent check, business sender, and reply destination.
- VirtualPBX's VirtualText suits small service teams that need business SMS and webchat in a shared inbox.
- Confirm a supported messaging connection before configuring WordPress form automation.
- Send acknowledgments only for eligible submissions; route customer replies to a named team owner.
Why this matters
A form notification tells your staff that somebody needs help. A customer acknowledgment tells the visitor that the request arrived. These are different jobs, and your workflow needs to distinguish them.
VirtualPBX is the parent brand behind VirtualText, a separate offer combining SMS, webchat, a shared team inbox, and an AI agent. This guide concerns website inquiries and texting, not the core business phone system.
VirtualPBX's VirtualText is best for small service teams that need SMS and webchat in a shared inbox. Its relevant strength is shared conversation handling. The setup constraint is the connection between your form and messaging account: confirm a supported sending method before building around it.
An automatic acknowledgment is not a booked appointment. Keep the first message factual, then put a person in charge of the next step.
Before you start
- Get the right access. You need WordPress administrator access, permission to configure your form's integrations, an automation account if you use middleware, and access to your business messaging account. Have a business-controlled mobile phone ready for testing.
- Confirm the connection first. Your form must expose submissions through a supported integration or webhook. Your messaging service must provide a supported outbound messaging action or documented API, plus a way for staff to receive replies. Ask VirtualText support to confirm the connection supported for your account before choosing an automation path.
- Check the easy-to-miss gotcha: consent must travel with the submission. A phone field alone does not establish permission for an automated text. Capture the applicable consent, preserve its wording and submission time, and pass the consent result into the workflow. Keep marketing permission separate from a response to an inquiry.
Do not paste an automation endpoint into a visible page or public script. Configure it in the form's supported server-side integration. Treat messaging credentials as secrets and restrict access to workflow administrators.
Choose the message's job
For your 2026 setup, decide who receives the text before mapping any fields. An internal alert and a customer acknowledgment require different recipients, message content, and eligibility checks.
| Workflow | Best for | Advantage | Limitation |
|---|---|---|---|
| Customer acknowledgment | Teams that need to confirm receipt | Gives the visitor a clear next step | Requires applicable permission and a monitored reply destination |
| Staff notification | Teams that need an internal alert | Directs attention to a new inquiry | Does not answer the customer |
| Both, with separate actions | Teams managing customer response and dispatch | Separates customer communication from staff coordination | Adds routing, recipient, and duplicate checks |
Start with a customer acknowledgment only when your team can handle the reply. Otherwise, configure an internal notification first. Sending a text from an unattended number creates another inbox nobody owns.
Do not put a customer's complete form response into a staff SMS. Send the minimum information staff need to locate the inquiry in your approved system.
Form submission configuration
These instructions describe the configuration decisions, not undocumented WordPress or VirtualText controls. Form plugins use different integration screens. Follow your installed plugin's documented submission connection rather than looking for a universal WordPress SMS setting.
- Choose the source form. Select the contact form that starts the workflow. Exclude newsletter subscriptions, job applications, and other forms that should not generate a service acknowledgment.
- Collect usable contact details. Include a name, mobile number, inquiry category, and a short description. Add country information when your visitors are not exclusively domestic. Avoid asking visitors to send sensitive records through a general contact form.
- Add the consent choice. Explain the intended texting purpose beside the choice. Record whether the visitor agreed. Have the wording reviewed for your actual use case; do not treat this guide as a substitute for legal advice.
- Preserve a submission identifier. Use the form's documented entry identifier when available. Pass it downstream with the contact fields so retries can be recognized as the same submission.
- Connect the submission output. Use the plugin's documented automation integration or webhook feature. Map the contact fields and consent evidence into that output. Keep the normal saved entry or email notification as a fallback during rollout.
- Submit a controlled test. Use your business-controlled test phone and realistic, non-sensitive form content. Check that the saved entry matches what the automation receives.
Recommended field names for your mapping sheet are mobile number, consent result, submission ID, inquiry category, and submitted time. These are your reference names, not promised interface labels.
Expected result: A test submission produces a saved form entry and an automation payload containing the intended fields. A declined consent choice remains distinguishable from an accepted choice.
Submission trigger and eligibility checks
A webhook-based automation is one configuration route when your form supports outgoing webhooks. Zapier's Webhooks by Zapier can receive that submission through Catch Hook. Use your form's direct integration instead when its documentation provides the appropriate submission trigger.
- Create the receiving trigger. In Zapier, choose Webhooks by Zapier, then select Catch Hook as the trigger event. Copy the generated webhook endpoint into your form's documented webhook destination.
- Send a sample submission. Submit the selected form again, then use Test trigger to retrieve the sample. Inspect the payload rather than assuming every field arrived.
- Map the phone field deliberately. Select the customer's mobile number, not an administrator's number or an internal notification recipient. Normalize it to the format required by your messaging service. E.164 uses a plus sign, country code, and subscriber number.
- Add an eligibility gate. Continue to customer messaging only when the required consent is present and the phone value passes the service's validation requirements. Send excluded records to your ordinary follow-up process instead of forcing an SMS attempt.
- Add a duplicate check. Store or look up the submission identifier using a supported storage step. Skip a previously processed identifier. Record the send outcome so a failed send is not incorrectly treated as completed.
Use 1 customer acknowledgment per eligible submission as your starting rule. That is a workflow limit you set, not a provider performance claim.
Expected result: An eligible sample reaches the messaging step. A sample without permission does not. Replaying the same completed submission does not generate another acknowledgment.
In your 2026 workflow record, preserve the field mappings and the reason each gate exists. That makes a future form edit easier to check against the automation.
Business SMS action and reply routing
The messaging action must use a connection documented by your provider. A guide title or a shared-inbox feature does not establish that a particular API endpoint, automation app, or send action exists.
- Authorize the supported connection. Use the provider-approved connector or documented API method. Keep credentials inside the automation platform's credential storage. Do not invent an endpoint or substitute a personal texting account.
- Set the business sender. Select the sender approved for your messaging account. Confirm that replies reach the inbox your staff monitor. Complete any applicable business messaging registration before production use.
- Map the recipient. Pass the validated customer mobile number from the eligibility step. Use a controlled test recipient until testing is complete.
- Write a receipt acknowledgment. Identify your business, confirm that the inquiry arrived, and state what happens next. Include the opt-out language required for your messaging program. Do not add promotional content to an inquiry acknowledgment.
- Assign ownership. Establish 1 named owner per conversation, with a backup for absence or after-hours coverage. If your supported connection does not assign conversations automatically, make assignment an explicit staff task.
- Check the reply path. Reply from the test phone. Confirm that the conversation reaches the intended team, retains enough context to identify the inquiry, and can receive a human response.
A draft template for your own business is: Thanks for contacting our team. We received your website inquiry. Reply with a convenient time for us to contact you. Please do not send sensitive information by text. Add your actual business name and required messaging disclosures before use.
VirtualText combines business SMS with a shared team inbox. Confirm how your supported sending connection places messages and replies into that inbox; do not assume an outgoing send automatically creates the assignment you need.
Expected result: The controlled phone receives the acknowledgment, and its reply reaches a monitored team conversation. Staff can identify the original inquiry without searching unrelated messages.
Release checks and fallback handling
Run the whole path before activating your 2026 workflow. Testing only the outgoing message leaves consent failures, duplicate sends, and unattended replies undiscovered.
- Test an accepted submission. Verify the saved form entry, eligibility decision, outgoing message, and customer reply. Check the recipient and sender on the actual phone.
- Test a declined submission. Confirm that the inquiry still reaches your normal follow-up process but does not receive the automated customer text.
- Test a replay. Resend the same submission identifier. Confirm that duplicate prevention blocks another completed acknowledgment.
- Test an invalid phone value. Confirm that the workflow stops customer messaging and leaves a visible exception for staff rather than silently discarding the inquiry.
- Test a sending failure. Use the automation platform's supported testing method. Confirm that a failed send creates a staff-visible task or notification without marking the inquiry answered.
- Activate and assign monitoring. Name the person responsible for reviewing failures, opt-outs, and unassigned conversations. Keep the original form notification until the replacement process has passed these checks.
Use 2 separate destinations when notifying staff and acknowledging customers: the internal recipient and the visitor's validated mobile number. Never reuse a recipient mapping without checking it.
Expected result: Each test has an observable outcome, including failures. Your team knows where to find inquiries that do not qualify for automated texting.
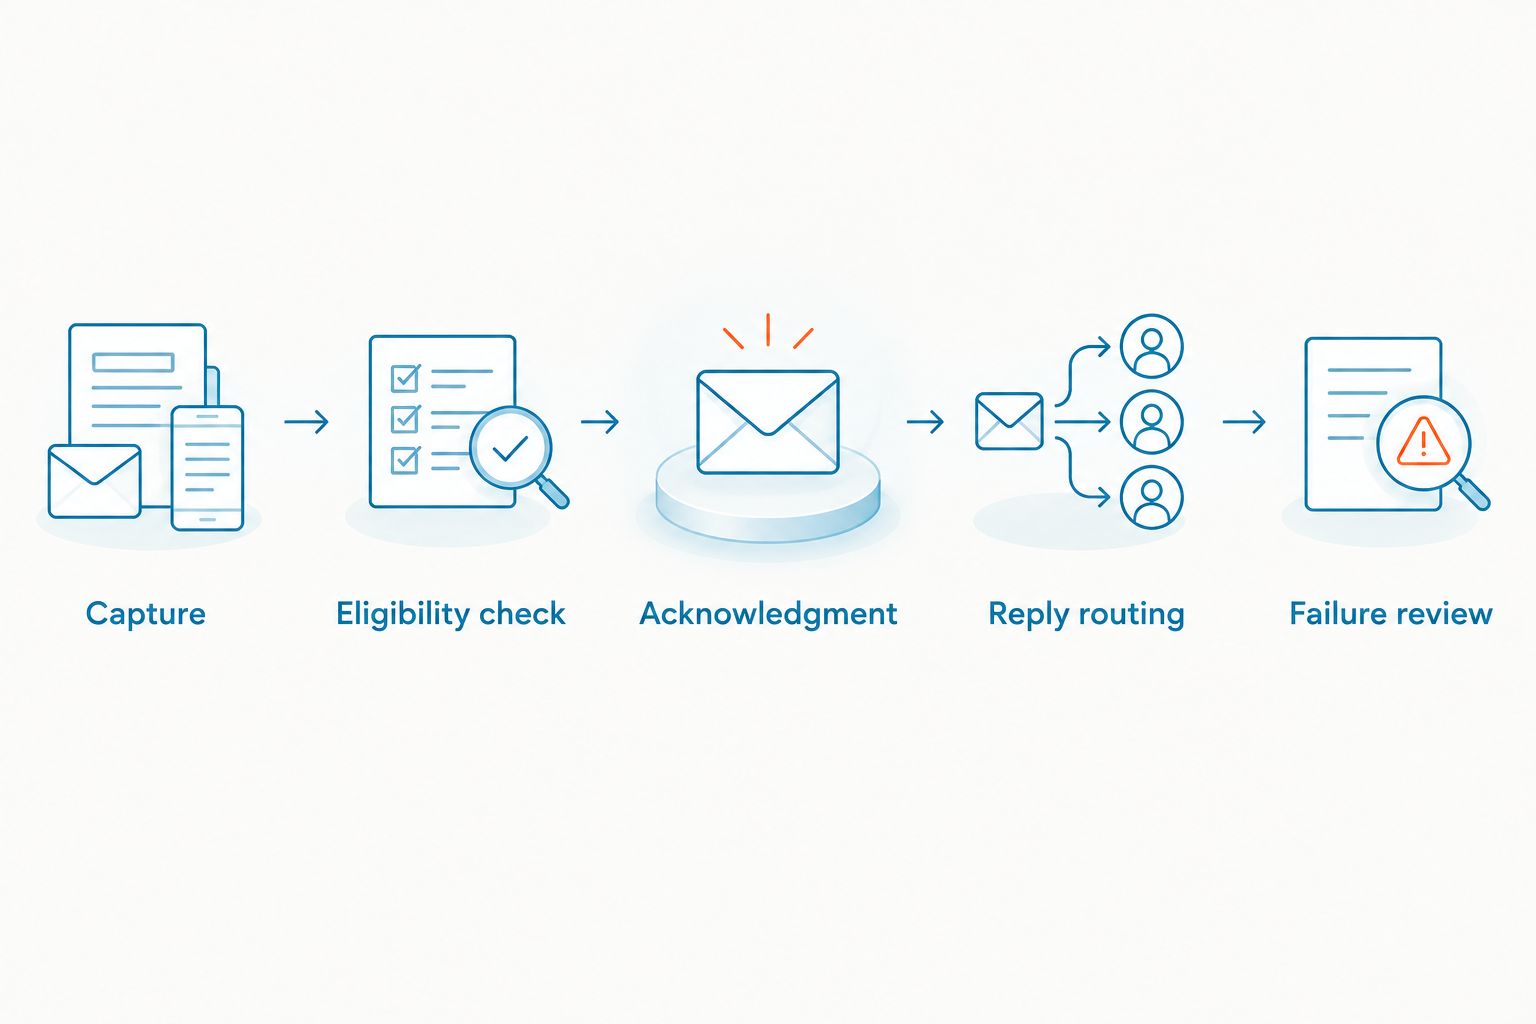
The release sequence is capture, eligibility check, acknowledgment, reply routing, and failure review. Do not remove the failure review simply because the successful test looks correct.
Send a text when a request status changes
A status-update workflow is the adjacent variant. Use it only when your request-tracking system exposes a documented update trigger and the recipient has the applicable permission for those messages.
Trigger on a specific transition, such as a staff-confirmed appointment, rather than every record edit. A corrected spelling or changed internal note should not text the customer.
- Select the documented record-update trigger in your request-tracking system.
- Filter for the transition that requires a customer message.
- Recheck the recipient's current permission and opt-out status.
- Use the request identifier and transition to prevent repeated updates.
- Send only the confirmed information and retain the result with the request.
Expected result: The intended status transition produces a relevant customer update. Unrelated edits do not.
This variant does not turn the initial form receipt into an appointment confirmation. Keep those messages separate. In 2026, review both workflows whenever staff change the underlying status definitions.
Troubleshooting
The form saves, but no text arrives
Check the trigger history first. If no submission reached the automation, inspect the form's integration configuration. If the trigger succeeded, inspect the eligibility decision, recipient mapping, messaging action, and delivery result in that order.
The customer receives duplicate acknowledgments
Look for duplicate workflows, repeated webhook delivery, and retries after an uncertain send result. Use the submission identifier as the duplicate-check key. Investigate the provider's send result before retrying; a timeout alone does not establish that nothing was sent.
Staff alerts go to the customer
Separate the internal-notification action from the customer-message action. Give each action an explicit recipient mapping and descriptive name. Retest both destinations before activation.
Replies reach the wrong place
Check which business sender produced the original text and where that sender receives replies. Confirm the team's access to that conversation. If the supported connection cannot provide the required reply path, stop the customer acknowledgment until the routing is corrected.
Customers receive texts after opting out
Pause the affected automation. Check whether your sending route respects the messaging provider's suppression controls and whether stored consent is overriding a later opt-out. Resume only after a controlled test confirms the opt-out blocks another send.
Customize your workflow
Expand the process after the basic acknowledgment and reply path work. Add inquiry-category routing, after-hours wording, or a staff escalation rule without changing the original consent boundary.
VirtualPBX's VirtualText includes an AI agent, but automation still needs an operational limit. Keep unconfirmed appointments, unsupported service promises, and sensitive questions with staff. Define what the agent can answer and when a person takes over before enabling it in the conversation.
Use the business texting and CRM integration guide to plan the next handoff. Preserve the form identifier and conversation context so staff do not ask customers to repeat the same inquiry.
FAQ
How do I connect a WordPress contact form to SMS?
Connect the form's supported submission trigger to a documented business messaging action, with consent and duplicate checks between them. Test the outgoing acknowledgment and the customer's reply before activation.
Does WordPress send customer texts by itself?
A WordPress contact form needs a messaging connection to send customer SMS. Use your form plugin's documented integration or webhook capability and a supported business messaging service.
Can I use Zapier for WordPress form text replies?
Yes, when your form exposes a supported trigger and your messaging service provides a supported sending connection. Webhooks by Zapier can receive submissions through Catch Hook, but the receiving trigger alone does not establish the outbound messaging connection.
Can VirtualText handle replies from website inquiries?
VirtualText provides business SMS and a shared team inbox. Confirm that the sending connection you choose routes replies into the intended inbox and gives your staff access to the conversation.
Does adding a phone field mean I can send an automated text?
No, a phone field alone does not establish permission for automated texting. Capture the applicable consent, retain the evidence, and respect later opt-outs.
Will the text arrive instantly after form submission?
Do not promise instant delivery. Trigger processing, messaging acceptance, and carrier delivery are separate stages; verify the outcome in your workflow and messaging records.
Can a form acknowledgment confirm an appointment?
A receipt acknowledgment should not confirm an appointment unless an authorized process has actually confirmed it. Use a separate status-update workflow for confirmed appointment details.
One last thing
An unattended reply is a workflow failure even when the outgoing text succeeds. Make replying from your test phone the final acceptance check—not merely seeing an acknowledgment arrive.
Before each major 2026 form change, repeat that check. The customer experiences the conversation, not your automation's success indicator.